Nov 18

Racking, Clarifying, Filtering, and Fining Your Mead

By Ulf The Viking King Of Northumbria | Making Mead

As we all very well know by now, there are so many fantastic meads out there for you to buy and try at your leisure. However, if you’re a true mead fanatic, you’ll agree that there’s nothing quite like the pleasure that comes from making your own sweet nectar.

As we’ve already seen, the mead-making process really isn’t really that complicated (although that’s not to say you’re going to get it spot-on every single time, or that practice doesn’t make perfect), and by getting stuck into making your own honey wine, you’re connecting yourself to an unbroken chain of craftsmanship which stretches back through the millennia. And that, my friends, is called: satisfaction.

This week, we’re going to be looking through the latter steps of the mead-making process, namely the racking, fining, and filtering processes in a bit more deeply, and see how best to approach these steps, and what differences they’re going to make to your eventual bottles of mead.

So, without further ado, let’s get to it….

Racking Your Mead

Once your mead has finished its primary fermentation, the must needs to be racked off the lees. This might have to happen within a couple of days after the fermentation starts, or  a few weeks, or even few months – it all depends on how quickly your musts ferment, and it’s worth keeping a close eye on how much it is bubbling away to ascertain when it best to do this. What you don’t want is your mead to sit on all those waste proteins and dead yeast cells, as this can result in your mead tasting a bit iffy when you finally come to drink it.

Generally speaking, it’s best to rack your mead as soon as the primary fermentation has completed, or to wait no longer than a month to avoid any sort of spoilage.

But what is racking? Essentially, racking is the process which involves siphoning off the clear mead away from the lees, or any other lumpy bits which have formed in the liquid. In order to do this, you’ll need a siphon (a tube which allows you to move the liquid from the murky container into a new one). This isn’t a difficult process – all you really need to do is to place the full container at a higher level than the empty one, and get the siphoning going, then allow gravity to do the rest for you. Quick note – we’re sure that real Vikings did this by sucking on the tube… but fermented must isn’t something you really want to get in your mouth, and the germs from your saliva probably aren’t going to do your mead any flavors either. Get yourself an auto-siphon, and avoid any unpleasantness this way!

The first time you rack your mead, it’s pretty likely you’ll make a bit of a mess. Make sure you give yourself plenty of space, and have a few towels to hand… it’s something which does require a bit of practice, but once you’ve got your technique sorted, you’ll be able to easily avoid getting sticky mead all over your battle armor (or lino flooring). We’d always recommend finding a way to get your carboy to sit at a slight angle while you’re racking – this allows the mead to pool to one side as the level starts dropping, and ensures you have less wastage. It’s understandable that you’ll want to try and get every drop of clear mead into your new container, but don’t try and push your luck and suck up too much of the stuff near the bottom. All that will happen is the lees will end up being transferred, and you’ll have to do the whole process again!

Once you’ve successfully racked off the mead from its primary fermentation, you’ll want to repeat the process every couple of months of so. You can keep an eye on your mead and see for yourself how quickly it is clarifying (most meads will clarify nicely on their own by repeated racking and waiting), and after about six months, you can tell if it’s going to clarify (known in the industry as ‘falling bright’) all by itself. Ideally, the line between the clarified mead on top of the carboy and the murky mead below it will drop and drop, until eventually, the mead will be almost entirely clear, and any lees or other residue will just collect right at the bottom.

Time Is Your Friend

Following on from the previous point, it’s important to remember that mead making is something which really shouldn’t be rushed. The creation of mead is a slow, gradual, natural and really rather beautiful process, and one which takes its own sweet time. We all want a crystal-clear golden mead – one which catches the sunlight in the glass, and shimmers beautifully like the Nordic sun bouncing off of Arctic waters – but in order to achieve the best clarification, your best bet is to give it plenty of time, and to commit to regular racking.

We reckon that by allowing the clarification process to come about naturally, you’ll be able to make a mead which really packs in the deepest, most satisfying flavors. What’s more – just like with a fine wine – this ageing process softens away some of the harsher edges of the mead, and allows for subtler secondary flavors to come through in the glass.

Clarifying and Fining Your Mead

OK – we’ve made our point about using time and racking to clarify your mead. However, we do understand that you might not always have nine months or more to allow that to happen (those monasteries aren’t going to raid themselves, after all). Mead-making takes up a fair amount of space, and it may well be that you don’t want huge carboys blocking your way for longer than necessary, or perhaps you want to give your mead as a gift for a special occasion which is fast approaching. We get it, believe us.

If your mead isn’t clarifying properly after six to nine months, it’s likely there is a surplus of protein in your liquid, or pectins, or other substances held in the honey or water you’ve used, which have settled and are stubbornly refusing to budge. If this is the case, you’ll have to consider using a fining agent – and there are many options available. Here are some of the most accessible for you to consider:

Bentonite

An absorbent clay that bonds with all those unsightly particles bobbing about in your mead. It comes in powder form, and you have to mix it with boiling water and soak it overnight, before mixing it though your mead. Bentonite is highly effective, but it will produce a lot of lees… so you’ll need to rack your mead another couple of times after using it.

Sparkalloid

The brilliantly-named sparkalloid (is it just us that thinks it sounds like an 80’s cartoon superhero sidekick?) is a combination of seaweed and earth, which cleverly produces a positive electrical charge in your mead. This causes the particles to repel each other, and settle on the bottom of your carboy, where they can be racked off relatively easily.

Isinglass

Made from the swim bladders of the sturgeon fish (yum!), this is a fining agent which is recommended for very pale meads. Once fined with this substance, your mead may require extra tannins to be mixed in.

Pectinase

Pectinase is a pectin enzyme which is great for breaking down the suspended pectin in your mead. It can help speed up the clarification process during fermentation, so you can actually add this substance before you set about clarifying and fining your mead.

Filtering

There are more than a few disagreements on the mead scene when it comes to pretty much any aspect of mead making… and that’s not necessarily a bad thing. We like the fact that mead lovers are protective and passionate about their way of doing things, and from these disagreements, we can strengthen our own positions, or take on board what others are saying. However, when it comes to filtering mead, we really reckon that there are plenty of people out there going about things the wrong way.

The fact of the matter is, mead is a drink which is supposed to show off its natural credentials. It’s made from honey – an almost magical substance which packs in mountains of flavor and character – and filtering seems to strip away so much of the character of mead, it seems nonsensical to do it. If you’re put off by a tiny bit of residue or cloudiness in your mead, then fair enough – filter away… we’ll try not to judge you. However, we’d strongly argue that in that slight cloudiness, those little inconsistencies, there lies the genuine article and the real soul of your drink. This is the nectar of the Vikings, of Medieval kings, of ancient cultures which prospered and plundered – and believe us, they weren’t bothered about filtering their tipple, so why should you be?

Even the wine industry (with all of its pretensions and obsessive attention to detail) has started to shy away from filtration and manipulation, and there’s a growing and highly influential trend in winemaking as a whole against filtering their produce. We want to taste that natural hit of sweetness and complexity, we want that bouquet to smack us between the eyes, and we want our mead to shine like the morning sun… and frankly, it’s our opinion that filtration cuts the balls off our favorite drink, and robs it of its true expression.

Corking and Bottling Your Mead

As any mead-maker will tell you, there is no part of the whole process more satisfying and pleasing than when you’re finally pouring your mead into its bottles, and popping those corks in the top of them. It’s the summation of all that hard work, all of that waiting, and – believe us – it’s absolute thrilling to see those bottles lined up in a row, showing off the stunning colours of your beautiful new drink.

It goes without saying that before you set about corking and bottling your mead, everything needs to be whistle-clean and sterilized first. Germs spread quickly on glass, and you want to make sure your mead is as perfect as possible before you start handing it out to your mates, or enjoying it on your own in front of a roaring fire.

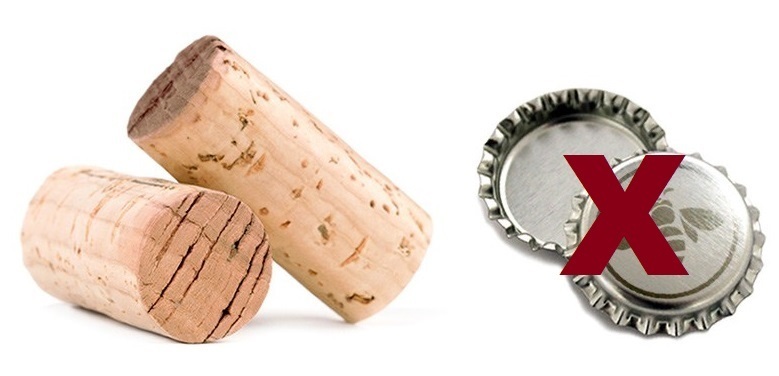
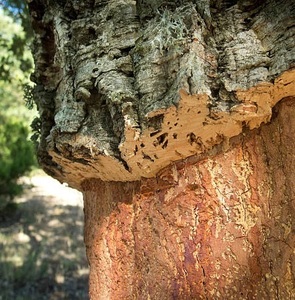
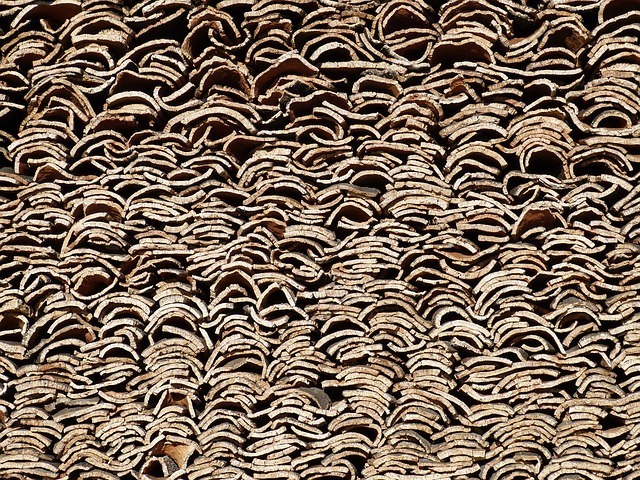
You’ll need to choose your corks and bottles wisely, too. Sure, if you want to drink your mead soon after bottling it, you haven’t got a huge amount to worry about – even a screw cap will do the job nicely. However, if you want to age your mead and explore its potential, you’re going to need something a bit more substantial – you want a cork which is going to allow in those miniscule amounts of oxygen needed, in order to create the magic that is the ageing process. It’s no good going with bog-standard cheap corks for this; you really need something of a decent quality, free from any taints, and which is going to do the job well. What’s more, you’ll want bottles which are designed for real use (rather than for decoration), as pressure changes within the bottle are going to put some strain on the glass. You can read all about how to choose your corks etc in our corking guide here.

In order to age your mead, it’s best for your bottles to be stored in a cool, dark place – sunlight will speed up with oxidation process, and can result in your mead spoiling well before its time. What’s more, exposure to heat will cause your mead to expand within the bottle, which could force the cork upwards from the neck, and allow too much oxygen inside… again, something which could be disastrous and might ruin all that hard work you put in!

For similar reasons, you’ll want to store your bottles on their sides in a wine rack or something similar. Why? Because the cork must always be in contact with the liquid, in order to ensure it stays moist and in place. Corks which dry or shrivel over time are going to lose their control of the amount of oxygen which penetrates the bottle, once again leading to too much oxidation. You don’t need access to a dungeon or specially-made wine cellar – most of us manage absolutely fine with a basement or garage!

Unbroken Traditions and Delicious Rewards

So, there you have it – a brief (ish) guide to racking, fining and filtering of your mead. It might seem like a lot to take in, but really, mead making is something which works best when it is driven by instinct, and fostered through patience and an unhurried, relaxed approach.

One other note:  like most hobbies, there is plenty of healthy debate regarding the best way to go about things. Here at The Men of Mead, we’ve got a fairly clear idea of what we want our mead to be like, and prefer to stick by the traditional methods that make us feel as much like battle-weary vikings as possible… but you don’t have to take our advice as gospel.

There are plenty of variations out there open to you, so use our guide as a starting point, and then see what works for your own personal preferences. Half the fun of mead-making is coming up with your own signature style, and once you’ve got the basics mastered, the world is your honey-drenched oyster.

Cheers!

Apr 03

How To Back Sweeten Mead

By Ulf The Viking King Of Northumbria | Making Mead , Mead Basics

Making mead never fails to be an exciting, mystifying and thoroughly satisfying process. It’s a way of connecting with an ancient past, a set of traditions that stretches back to icy forests of northern Europe, when mead was the ultimate treat awaiting explorers, warriors, hunters and travelling nobles on their return home.

However, that’s not to say that the finished product of homemade mead always manages to hit the spot straight away. The problem often comes down to the fact that we have a very clear preconception of what mead is supposed to taste like, and our homemade efforts occasionally don’t completely fit the flavors we have in our heads. The reasons for this are many, but generally involve the reality of working with natural ingredients and processes, which are – by their very nature – sometimes a little unpredictable.

The main source of disappointment when tasting your homemade mead is that it simply isn’t sweet enough for your liking. As mentioned, we have a clear preconception in our heads: mead = sweetness. After all, isn’t it packed full of honey? The problem here is that the fermentation process can alter or deplete the sweetness of honey, and thus lead to a drink which tastes quite different from what we were expecting.

However, us Vikings aren’t swayed by this, and always have a few tricks up our sleeves to rectify any problem. The solution? Simply use our process to back sweeten mead, and put that sweetness into the mix again once the mead has been made.

Bringing The Sweetness Back

Back-sweetening essentially involves adding sweetness or some kind of sugar to your mead once it has already fermented. This will boost the sweetness of your mead, and bring it up to a more palatable level.

You might imagine that this involves little more than dumping a load more honey into your mead, and giving it a good stir. However, this will cause fermentation to restart, which is going to lead to a load of – potentially very messy – problems. For example, if you try to bottle you mead after kick starting the fermentation process once again, you’re looking at a load of exploded bottles, and a smelly, sticky problem on your hands… which could be really rather embarrassing, especially if you’ve already handed out a load of your beautifully bottled creations to your friends and family.

Easy Back-Sweetening Solutions

The easiest way to back-sweeten your mead once it has fermented is to get your lab coat on, and experiment with some easily obtainable chemicals. The trick is to find something that will inhibit the yeast activity in the mead, which will allow you to add a load more honey with having the fermentation process beginning again.

Our recommendation? Get hold of some Potassium Sorbate, and some Potassium Metabisulfite, which will do the job perfectly. Follow these steps, and bring your mead up to the gold standard you and your marauding mates deserve:

  1. Ensure the fermentation process has properly ended before you do anything. You can check this with a hydrometer.
  2. Pour the potassium sorbate and potassium metabisulfite into the mead, and gently stir it all in.
  3. Allow the mead to settle for two days, and for the yeast activity to be fully halted.
  4. Add the amount of honey you require to get the flavor just right, and stir gently to allow it to mix in properly.

One thing to bear in mind here is that the added honey is likely to cause some cloudiness in your mead. Here at Men of Mead, we don’t mind a bit of cloudiness – it doesn’t affect the drinking experience, and adds a bit of old-fashioned rusticity to our favorite drink. If you really want to bring some clarity to your homemade mead, you can use a clearing agent to achieve the right result, or you could wait for the mead to age and clear up by itself.

Hopefully, however you choose to approach it, you should be able to achieve deliciously sweet, tempting, and moreish mead without much difficulty by following these tips

Cheers!

Feb 26

How to Appreciate Your Mead – A Brief Guide

By Benjamin Norris | Mead Basics

Life is full of beautiful moments, but for us, most of them tend to revolve around a glass (or two, or three…) of quality mead. It has been the fuel for many a raucous night with our friends, and it has led to deep and winding conversations in which the world has been well and truly set to rights.

In short – as you’ve probably guessed, we’re more than a little obsessed with the stuff.

It isn’t hard to see why. There’s something truly special about this most ancient of drinks; each sip connects us to centuries of history, and the aroma alone brings to mind images of Viking longboats, torch-lit castles, and times long passed, in which the warming taste of this unique honey’d wine would provide respite and comfort from the frozen north…

OK, we may be getting a little carried away there.

However, it cannot be denied that mead is an especially evocative tipple, and one which isn’t just for quaffing messily from a drinking horn with the din of battle behind you. Indeed, we’d argue that while there’s a time and a place for more lighthearted drinking of mead, there’s also plenty to be said for taking mead drinking a little more seriously.

We’re not suggesting you become a full-blown wine-style snob when it comes to mead, rhapsodising excessively over the slightest suggestion of different notes and flourishes of flavour. We’re just saying that, with a bit of concentration, preparation and dedicated time, you can take your mead drinking to the next level, and learn to truly appreciate your mead’s subtleties. Want to know how?

Check out our five steps to true mead appreciation below.

Whisper Words of Wisdom: Let it Breathe

Some traditional meads and darker meads have plenty in common with full-bodied red wines. They’re both packed full of flavour, derived from natural ingredients, and feature the kind of volatile aroma compounds that can really benefit from a few minutes of ‘breathing’ in the glass or via the open neck of your bottle.

By leaving your mead for a few minutes to breathe and open up, you’ll give the rougher edges of the drink the chance to smooth themselves out and soften. The result will be a far more palatable experience – flavours and aromas will express themselves more fully, and the initial harshness of certain meads will have faded away. While the precise science of ‘breathing’ your mead (and wine) has been debated for absolutely ages, it’s worth giving this process a try – you might notice a significant difference.

Get The Glassware Right

A Perfect Glass For Assessing Mead

A Perfect Glass For Assessing Mead

Listen, we’re all in favour of necking your mead from a drinking horn, pewter goblet or tankard when you want to rock the full-on medieval king vibe. However, if you’re looking to raise your overall mead drinking experience into something more meditative, thoughtful and appreciative, then getting the right glassware for the job is key.

Firstly, we’d recommend opting for a drinking vessel made out of clear glass and crystal. Enjoying and appreciating the colour of your mead should be the first step of your drinking experience – meads come in a massive range of soft honey tones; from the palest gold to the deepest amber, and taking a moment to absorb yourself in these colours is an important first stage of the tasting process.

Stemmed red wine glasses are probably your best bet for mead tasting. The wide bowl allows the aroma of the mead to fully manifest, and it also provides an adequately large surface area for the evaporation process to do its thing. The same effect can also be achieved with a brandy snifter, so feel free to experiment and figure out what’s best for you.

Hitting the Perfect Temperature

When it comes to tasting almost anything properly, temperature is really important. With mead, you need to be careful that you aren’t pouring a glass straight from the fridge – this is really going to hamper your ability to taste the drink properly.

The reason for this comes down to the way aromas and flavours are released from a liquid. When the mead is too cold, it will be ‘closed’ – that is, it will be more stable, and won’t release the gases required for proper appreciation. The general recommendation here is to treat your mead like a red wine, and serve it at cellar temperature (around 52 – 70 degrees fahrenheit). Lighter meads can be slightly chilled to a similar temperature at which you’d serve a full-bodied white wine.

If you’re mulling your mead, of course, this advice can be ignored – get it heated up in your trusty cauldron, spike it with plenty of spices, and let it warm you to your toes.

Evaluation

So, we’ve allowed the mead to breathe in the bottle. We’ve poured it into the correct glassware, and have ensured it’s at an optimum temperature. Now, we’re ready to evaluate and enjoy this most special of drinks. It’s a step by step process which, when done correctly, is capable of taking you to new heights of pleasure… so pay close attention, now…

Step one: Taste with your eyes

Take a moment to enjoy the colour of your mead, and hold it up to the light to see how this changes the tone of the liquid. Swirl it a little – does the mead have ‘legs’ – those rivlets of liquid which cling to the side of the glass? How viscous or sticky is the mead? All of these things should be noted before moving on.

Step Two: It’s all in the nose

Give your mead a decent swirl around the glass, with one of your hands covering the top of it. Remove your hand, and give it a good sniff, deeply inhaling the aromas which have been released.

As you take in the fragrance of your mead, allow your mind to wander into its depths. Is the smell pleasant, or not? Does it remind you of anything? Sniff again, and try to seek out those subtleties which every good mead presents to the drink – what else is there hiding in those golden depths? All honeys have their own distinct characteristics, depending on the flora which the bees feed from. Can you pick up any particular floral scents in there, or traces of spice or fruit?

Step Three: Tasting time

Finally, it’s time to put your palate to work.

Take a slow and deliberate sip of your mead, drawing in a little air as you do so (if you’re alone, feel free to slurp as you wish – we aren’t going to judge you). Let it run across your tongue and cover each part of your mouth before you swallow.

There are three distinct stages to tasting mead. That first hit of flavour that you experience is known as the attack, or ‘fore’. Once that’s begun to fade, you’ll come across the second, or ‘mid’ flavours. After swallowing, you’ll be left with the aftertaste. Each stage may bring different notes, and have different things to say about the mead. Take your time to identify any flavours that leap up at you, and hunt out those that skirt around the peripheries. You may be surprised at what you find hiding there.

Appreciating The Nectar Of The Ancients

So there you have it – our brief guide to truly appreciating and admiring your mead. It’s not necessarily something you need to do with each and every bottle you open – after all, if you’ve found a mead you really love, you’re likely to return to it again and again, and will know more or less what to expect on repeat tastings. However, following this process and the tips in this article will really help you to develop and train your palate, and allow you to really get a kick out of each mead you buy.

In essence, treat your mead with the respect it deserves, and take a bit of time to delve deep into the wonders it holds. This is a drink that has been treasured for millennia, after all… and not without good reason.

Jan 31

What Your Mead Drinking Vessel Says About You

By Mike Word | Mead History

Ah, mead. Is there a finer drink on this green earth? Is there any nectar which warms the belly more, ignites the senses further, or which can delight and excite in quite the same way? We certainly think not, and – if you’re reading this blog – we’d hazard a guess that you feel much the same way.

Today, the mead industry is booming once more. We’re seeing dozens of types of mead coming onto the market every year – spiced versions, flavored meads, traditional drinks and those with a more modern twist. As such, it’s high time we posed the question: what does your mead-drinking vessel say about you?

Make no mistake – your choice of cup or chalice is something which expresses plenty when it comes to your personality, approach, and dedication to our beloved drink. Whether you’re a fur-wrapped marauder from the frozen north, a cloistered hermit, or a contemporary bar-crawler with a taste for the sweet stuff, we reckon we can make a fairly solid judgement from the way you sip your mead.

Anyway, enough idle chatter! Let’s dive right in…

The Viking Drinking Horn

A Sweet Viking Drinking Horn

A Sweet Viking Drinking Horn

Your Profile:  Rugged, Zealous, and (ahem) Horn-y.

Before the time of glass, or the invention of the cup, there was the viking horn.  As one of the oldest known drinking vessels there is, it pops up in the illustrated histories of Ancient Greece, the Balkans, Scandinavia, Georgia and Armenia, and remained a consistent feature of ceremonial drinking well into the medieval age.

No true Viking would ever set out from his longhouse without his trusty horn – to drink from this type of vessel is to pay homage to the great god Thor, who stored the seven seas within his mighty and elaborate horn. The epic hero, Beowulf, necked a quart of mead from his before slaying Grendel, and it clearly did the trick; his actions were recorded and praised forevermore.

If you’re the kind of mead drinker who likes to lift a honey’d horn to your lip, then it’s likely you’re someone who’s happiest when on the move. Whether that means going on a road trip with your mates, jetting off to some far-flung location on holiday, or loading up your longboat and pillaging the monasteries of Northumbria, you’re somebody that appreciates wide open spaces and has a thirst for adventure. On top of that, you’ve got a slightly flashy, ceremonial side to yourself, and have no problem proudly displaying your love for this ancient and delicious drink.

Tankards

Wood Tankard Fer Drinking Meade

Wood Tankard Fer Drinking Meade

Your Profile:  No-Nonsense, Old Fashioned, a Heavy Drinker

Masculine, heavy, practical and durable, the tankard is – for many – the archetypical old-fashioned drinking vessel. The earliest known examples from 2000 years ago were made out of wood, and could be absolutely enormous (a 4-pinter was found recently at a dig in Wales), which suggests that the people who owned them were somewhat strangers to the idea of drinking in moderation.

By the age of Viking Europe, tankards made from pewter and silver were more common, meaning they could last a very long time and carried from place to place with the owner. The Germans were particularly famed for their lidded tankards, and this type of drinking vessel is seeing something of a resurgence today.

Careful – This Cartoon Is Drunk

If you’re a fan of the tankard, the chances are you’re a no-nonsense sort of mead drinker. You haven’t got time for messing around with fancy-pants inlaid gems, or dainty cups for small quantities of mead. You like your booze to come with plenty of volume, and are no fan of half-measures of anything in life.

Perhaps you’re also not the best when it comes to sharing – you like to keep your precious mead all to yourself, and if you can stick a lid on it to stop others from trying to steal a sip, well, that’s even better.

Goblets

Pewter Goblets For Mead

Pewter Goblets For Mead

Your Profile:  Sophisticated, Noble, Powerful

With their elegant shape, luxurious decoration and sophisticated yet artisanal style, the goblet has rightly been the favored drinking vessel of kings, lords, ladies and the nobility for centuries.

However, the history of this particular type of cup has not always been so glamorous. The earliest examples of goblets would have been made from simple pottery – archaeological records state that the first goblets would have been fired some time around 4000 BC. With the arrival of the bronze age, this predecessor of the modern wine glass started to be made from precious metals and inlaid with gems, and there are plenty of ancient finds which would have been used as status symbols and displays of wealth and power.

After the Roman invasion of Europe, metalworking took off in a big way. Silver, gold and other similar metals were used in the making of goblets; they began to take on religious significance, and started being used in ceremonies and sacred rites. When the Vikings landed in ancient Britain, gold goblets would have been among the first items stolen from the monks… and no doubt would have been quickly used for the quaffing of mead (as is right and proper, after all).

If you like to down your mead from a bejeweled goblet, well, let’s just say you’re somebody who appreciates the finer things in life. Maybe you’ve saved up your coins and bought one for yourself, maybe you raided a local church and filled your boots that way… who are we to judge?

Goblet drinkers appreciate beauty, craftsmanship and have no objection to a bit of bling every now and then. You see mead as something special, something rarified and unique, and you want to give your favorite tipple the respect and sense of ceremony it deserves. Good on you!

Mazer Cups

Old School Mazer Drinking Vessel

Old School Mazer Drinking Vessel

Your Profile:  Understated, Friendly, Wistful

While less well known as ancient drinking vessels than horns and goblets, the mazer played a significant role in communal drinking during the dark ages and in Medieval Europe. It was popularized by the Normans, who came down from Denmark and into France, and later conquered England after a nasty incident involving an arrow in the eye of a certain English king.

These decorative drinking bowls would have been shared among noblemen at vast banqueting tables, and passed from one person to another during meals and other communal gatherings. Certain bowls were so popular, they even became family heirlooms and had their own familiar names… which suggests that they were seen as much more than just mere drinking vessels.

So, you’re the kind of mead drinker who favors the mazer, then? If so, it’s likely that you like nothing more than getting together with your friends and allies, and see mead drinking as something which requires music, laughter, the occasional dancing wench and plenty of food to go with it.

You like to look after your belongings, and have a tendency to get attached to objects, but all in all you’re someone who enjoys a party and feels comfortable in crowds.

Modern Mead Glassware

Mead Glassware Example

Mead Glassware Example

Your Profile:  Discerning, Smart, Serious 

The world has moved on somewhat since those misty days of battle cries and sea voyages of discovery, and mead drinking has very much evolved with it.

Today, you can find specially-made mead glassware in several quality stores – glassware which has been carefully designed to heighten the drinker’s enjoyment of their mead. With the right size and shape, these glasses accentuate the properties of aroma and flavor, and allow the drinker to fully appreciate the subtleties of their drink.

If you prefer using modern mead glassware, it’s likely you’re not the kind of person who goes in for the ceremonial, historic aspects of mead-drinking. Instead, you’re the type of drinker who takes their mead quite seriously – you give it the respect it deserves, and spend time recognizing and appreciating the different flavor and aroma profiles each mead presents on the palate.

You most likely extend this to many different things in life; you’re mindful of the food you buy, you like to experience everything at its utmost, and you take a sincere approach to the things you enjoy, determined to eke out every inch of enjoyment you can.

Well, there we have it – our rundown of the things your mead vessel says about you. Where do you fit it? Let us know in the comments below

Cheers!

Jan 08

Spotlight on Lindisfarne Meadery

By Paul Fuller | Meadery Spotlight

Based on some strong suggestions from our British contingent, we’ll be taking a look at the famous Lindisfarne Meadery, the so-called ‘Legend In A Bottle’ which hails from a tiny, wind-swept island and pilgrimage site in the North-East of England.

Big History…

When it comes to historical credentials, Lindisfarne Mead is pretty hard to beat.  Situated in a small borough on the very northern tip of  England on Holy Island, the Lindisfarne meadery has wonderful bay views from the 16th century citdel Lindisfarne Castle, and has been run by an order of monks who have been distilling the island’s honey for well over a thousand years.   Holy Isand itself was the location of the first Viking conquest of Northumbria back in 797 A.D – the event which kick-started the Viking age of Britain.

Lindisfarne Castle

Lindisfarne Castle

The distillery makes a big deal out of their history and connection to these times. Indeed, the bottle itself is decorated with medieval patterns inspired by the Lindisfarne Gospels; a series of ancient religious texts famed throughout the world for their beauty and intricacy.

…And A Bit Of Controversy

Despite their long lineage in the world of mead, there’s actually been some real controversy surrounding Lindisfarne Mead recently, which all came to a head when the monks tried to export their produce to the US a couple of years ago. The issue came down to whether or not this ‘legendary’ drink could really be considered mead at all, as it is blended with fermented grape juice and herbal extracts, and not simply made from distilled honey.

The monks got around this by changing the name of the US export to ‘mede’ (the medieval spelling of mead), and backing themselves up with plenty of examples of historic drinks made in a similar way.

Admittedly we’re more than a bit finicky here about our favourite drink, so  we’ll overlook this controversy just this once, due to the backstory of this amazing place and the damn cool aesthetic design on the label.

Lindisfarne Bottle

Lindisfarne Bottle

Lindisfarne Mead comes in a few different styles (including a spiced version which is excellent for mulling), but we’re going to be reviewing the standard version today, which should be drunk slightly chilled and preferably while taking in a rugged view of the tempestuous North Sea. If you can’t manage that, then your own living room would probably do just as well.

Interested in how it tastes?  Check out our review of Lindisfarne’s original traditional mead recipe

Dec 18

Mulled Mead – It’s Not Just For Viking Christmases Anymore

By Ulf The Viking King Of Northumbria | Making Mead

As the days grow colder and the wild winds start blowing down from the north, there are few things more satisfying or warming than a glass or two of something steaming, delicious, and (ahem) alcoholic.

As dedicated lovers of all things mead-related, we look forward to the chillier end of the year for this very reason; it gives us the perfect opportunity to spend the evenings huddled before an open fire, and toasting the winter nights with a cupful of mulled mead – what could be better?

Because the mead we drink today originated in the frozen reaches of northern Europe (where the winters are harsh, dark and painfully long) it only makes sense that mulled mead, warmed through with an assortment of delicious spices, is a long-standing tradition that continues to this day.

It’s a drink that delights the palate as much as it warms the belly, and when prepared properly, it’s the perfect remedy to get you through the dark and for bringing people together. Let’s take a deeper look at this ancient and utterly satisfying tipple, and consider a couple of tried-and-tested historic recipes you can prepare at home.

A Brief History of Mulled Mead

As with most things connected with the ancient history of mead, wine and other alcoholic drinks, a lot of the specifics have been lost in the mists of time. However, we can pretty accurately pinpoint the origin of mulling as a practice (that is, warming alcoholic drinks spiked with spices) to the Roman conquest of central and northern Europe in the 2nd century AD. The Romans were notoriously fanatical when it came to wine, but their culture was one based in the sun-soaked valleys of Italy… we can only imagine how much of a shock they must have had when faced with winter in central Germany, or on the borders of Scotland.

As such, they began heating the local wines they were making to keep their armies happy, and various herbs and spices from across the empire were added for their medicinal properties, as well as for their flavor and the extra kick of warmth they brought. The various peoples under Roman occupation in these parts of Europe quickly got a taste for the stuff, and before long, they were mulling more or less everything: beers and ciders across Roman Gaul (France) and in England, and mulled mead started appearing in the north soon afterwards.

While mead-drinking on the whole has become less and less common throughout the past few centuries, mulled mead is still very much enjoyed in a couple of places to this day as a traditional celebratory drink. Various parts of Sweden and Norway still enjoy warmed, spiced mead at Yule (or Christmas time), and no May Day celebration in Finland would be complete with a cup or two of this most special of drinks.

In Lindisfarne, too – the spiritual home of traditional mead production in the UK – mulled mead is still served to tourists and pilgrims in the winter months, as has been the case since the Viking conquest.

Making Mulled Mead

Heating Spiced Mulled Mead Old School

Heating Spiced Mulled Mead Old School

As with making any mulled drink, there are several routes you can go down when preparing mulled mead, and there’s plenty of scope for personal preferences and experimentation. The only real rules, however, are to ensure that your mulling spices complement your mead (and don’t completely overpower its unique and distinctive flavours) and that you warm it properly and gently, in order to not alter the character of the mead itself.

Warming Your Mulled Mead

If you want to go all-out Viking with your mulled mead (and why the hell wouldn’t you?) then you can heat up your drink in the most traditional way – by pouring the mead and the spices into a pot, and then dunking a red-hot iron or poker into the mead itself. While this certainly makes for a dramatic way of preparing this winter tipple, it can be a little tricky if you don’t have access to an open fire and the tools for the job.

Most of us make mulled mead in the same way we make other mulled drinks; by heating up the mead and spices together in a saucepan, on a very low heat over a long period of time. The important thing is to not let it boil – this will cause the mead to reduce, and the spices will turn bitter and really quite unpleasant. Some people get by with a crock-pot, too, but we imagine this takes a bit too long… on those cold winter nights, you’ll be wanting your mead fix a little more swiftly!

Flavoring Your Mead

Cinnamon and spice and everything nice

Cinnamon and spice and everything nice

Most mulled drinks recipes follow a similar set of ingredients to create that distinctive, warming, yuletide vibe. These generally involve a handful of warming spices, a bit of citrus, and a couple of other possible alternatives based on regional variation and preference.

Gettin’ Spicy

The key spices for making your mulled mead according to the traditional recipe are ginger (from the root, not powdered), cloves, and cinnamon. The three of these working together create a flavour which has bewitched people for centuries, and are widely believed to help with a wide array of ailments. While these are the definitive ‘holy trinity’ of mulling spices, it’s not uncommon to see others thrown in the mix, such as nutmeg, star anise, allspice and cardamom – all of which bring that characteristic warmth and sweetness to the drink.

Fruity Additions

Citrus fruits have been associated with winter celebrations for centuries, and oranges, lemons and tangerines were actually given as fashionable gifts during the Victorian era in England (probably to show off your links to the empire). Mulled mead requires a fairly delicate touch of citrus to balance out the sweetness… but again, a little goes a long way. Most recipes call for a strip of lemon peel and a whole orange to be left in the pot, which we reckon should suffice. We’ve seen recipes suggesting a glug of apple or juice, which might be quite nice to drink, but would probably take away something from the mead itself.

A Little Extra?

The Swedes clearly like to add an extra punch to their mulled mead, as most of the recipes we’ve seen from this country suggest adding a few shots of brandy or aquavit to the pot. If you want to boost your winter brew in this way, then go ahead – it’s sure to put a fire in your belly and get the party started a little more quickly. Steer clear of more strongly flavored or other sweet liqueurs, though (I’ve just seen a recipe suggesting Amaretto in your mead, which sounds appalling, to be honest), as you really want the base flavors of the mead itself to shine.

A Traditional, No-Nonsense Mulled Mead Recipe

Spiced Mulled Mead Recipe

Spiced Mulled Mead Recipe

  • 2 cardamom pods
  • ½ tsp allspice
  • 1 cinnamon stick
  • ½ tsp whole cloves
  • 1 whole nutmeg, smashed with a hammer
  • Half a thumb-sized piece of ginger
  • 1 slice of orange rind
  • 1 slice of lemon rind
  • 1 bottle of top quality, traditional still mead

Directions:

  1. Firstly, gently crush the cardamom pods and allspice berries using the flat side of a knife.
  2. Next, take a cheesecloth of mulling spices bag, and put the citrus peel, the cardamom seeds, the crushed allspice, one piece of your smashed nutmeg, and all the other spices inside before tying a tight knot in the top.
  3. Pour the mead into a saucepan, and drop the spices bag inside.
  4. Gently heat until warmed through (do not boil), and serve among friends.
Dec 07

Corking Your Mead

By Ulf The Viking King Of Northumbria | Making Mead

Thinking about aging your mead?  If you’ve found your way to this article, we are going to assume you’ve made the very WISE decision to cork, rather than hard cap your mead.  A wise choice indeed, as capping a fine mead is like topping a filet mignon with McDonald’s Special Sauce™.

Hey, we’re not trying to be snobs or anything.  Bottle caps are perfectly acceptable for bubbly session meads, but that’s about it.  And don’t even get me started on synthetics, or so-called “super-corks”.

Screw caps?  Forgetaboutit!

Aging Your Mead? Be Classy And Cork It

Aging Your Mead? Be Classy And Cork It

Look, corking your bottle is at the very end of the long mead making journey, and all your hard work deserves a topper that reflects the quality of your brew, right?  While it adds nothing to the taste (hopefully), a good cork adds some manly flair to the presentation of your bottle, and most importantly keeps the mead’s final vessel air tight (actually nearly airtight – which is a good thing – but we’ll get to that later),

So in today’s article we’ll cover all you ever need to know about corks and corking your mead, starting with:  What the hell is cork anyway?

What The Hell Is Cork Anyway?

What is Cork

Cork comes from the phellem layer of the bark of the Cork Tree (Quercus Suber), which is the secondary, softer layer of bark just behind the hard outer layer.

Part of the Oak Genus of trees, the cork tree has develop this layer for protection from the periodic forest fires in it’s native Mediterranean habitats in Western Europe and North Africa.

Most cork groves are harvested when the tree reaches 25 years old, and then every 9 years after that.  If debarked properly, the tree is minimally affected by the removal of the bark, thus making the process sustainable.

Stripped Cork Tree Bark

Stripped Cork Tree Bark

While the trees do become more susceptible to fire, many of the harvested cork forests, specifically in Portugal and Spain (where around 80% of the world’s cork comes from) have matured to old-growth status, becoming a haven for plants and animals found nowhere else in the world.  Most cork trees live up to 130 years, with some growing up to 300 years or more!

Why Cork Is Great For Aging

Cork’s phellem layer of bark has an elastic, yet sponge-like property which is completely permeable to liquid, but porous enough to allow a small amount of air to pass through over time.

These unique properties make it perfect for aging wines, meads and higher abv beers since this limited air transfer is actually required to gracefully age the contents over time.

Too much air can cause over-oxidation (you know the taste), and too little – or no air – limits the aging process.

How Is Cork Made

Making Cork

Once the cork bark has been harvested from the tree, it goes through a specific manufacturing process, whose basic steps have changed little for centuries:

1.)    The cork is bundled and boiled. With the added moisture, the bundled cork bark becomes flattened and easier to work with.

2.)    The cork bark is placed on a flat, dry, and clean surface for 3 to 6 month.  “Clean” is the keyword here in order to limit any contamination or bacteria.

Cork Bark Drying In The Sun

Cork Bark Drying In The Sun

3.)    The cork bundles are cut into strips depending on the cork length and width requirements (they make all kinds!)

4.)    The strips are sent to workers or machines that punch out the cork shapes.  The scraps and byproduct are further processed into cheaper cork stoppers called Agglomerated, Colmated, or Technical Corks.

5.)    The natural corks are then separated mechanically by air porosity.

6.)    The corks are further separated by grades by skilled workers.

7.)    The cork is vacuum sealed and prepared for shipping.

If you’re a visual learner, here’s a great video of the process as used by the Amorim Cork Company in Portugal:

Corks History as a Closure

Cork History

With its classic looks and function you’d think that cork has been the topper of choice for as long as people have been drinking mead, but you would be mistaken. Before cork became the standard bottle closure, all sort of other methods were employed to top off a bottle of mead, including leather, glass beeswax, clay, and even oil-soaked cloth.

Inconsistent Containers

While cork was well-known for its sealing properties going all the way back to ancient Greece, the problem wasn’t the topper, but rather the vessels that contained the liquids.

Whether the container was clay, glass, pewter, or something else, the manufacturing processes for these containers were inconsistent, never quite allowing a uniform surface for a closure like cork to reliably seal the container.  The finest bottle makers hand-made their closures with each bottle to create the best seal.  As you can imagine this made bottle making very expensive, and thus available to only the richest of customers.

Lead Baluster Gobler Circa 1700

Lead Baluster Gobler Circa 1700

Making Good Glass

What mead drinkers really needed to age their fine meads, they got in the form of English businessman George Ravenscroft who perfected a method to use lead with glass making process on an industrial scale.

Lead stabilizes molten glass, allowing for a longer period to manipulate the glass, as well as the ability to form the glass over templates.  All of a sudden, bottles were being produced that had consistency in the neck size.

French wine makers were some of the earliest vintners to notice that wine bottles stopped with cork had the ability to age and evolve in the bottle.  As the legend goes, the French monk, Dom Perignon (c. 1670) was one of the first to discover that natural cork was superior to sealing wine with a rag.  With this new discovery, the French were able to establish premier aged wines brands that have withstood the test of time.

Cork: The Topper Of Choice

Fast forward 300 years and natural cork is still used in the majority of wine closures – between 65 – 70 % of all bottles sold today.   While there’s no official number for the use of cork for mead makers, we’re guessing at similar numbers since the fermentation process of mead is closely related to wine.


Cork Quality

Cork Quality

Since natural cork stoppers come from a natural source, it’s going to have imperfections.  It can also be susceptible to pathogens like bacteria and mold.  When evaluating the cork quality, the Men of Mead are looking at two criteria, specifically:

1.)     The air permeability

2.)      The presence of contaminants (namely “trichloroanisole” or TCA)

Let’s look at each individually:

Air Permeability

Mead, just like wine, needs just the right amount of oxygen and nitrogen to age gracefully in the bottle.  Too little, and the unwanted byproducts of the fermentation process, tannis, or brewing additions (sulfites) remain unprocessed.  Too much and over-oxidation will occur.  Both scenarios can compromise the quality of your mead in different ways.

How?

Generally-speaking, an over oxidized mead will develop a flat, ripened-fruit and / or nutty smell and taste, while anaerobic conditions (i.e. no oxygen) can impart off-colors in your mead, acrid smells, and a bitter taste.

Creating The Perfect Conditions

To create the goldilocks conditions in your bottle of mead, you’ll need to buy cork that let in just the right amount of air into the bottle each year.

What’s the ideal amount of air permeability?   For a typical filled wine / mead bottle, that would be around 1 milligram of air each year.  Needless to say, that’s not a lot of air.

You’re probably wondering, “How can I test a cork for 1 milligram of gas permeability through a cork?”

The answer is:  You can’t.  Unless you are a fancy scientist with access to a fancy laboratory.

For us non-fancy-scientists, we have to rely on test data either established by the manufacturer, or through visual grades provided by industry organizations like The Cork Quality Council (CQC).

For example, the CQC uses a visual system to grade corks into three classifications (A, B & C);  the “A” classification represents “as close to the ideal cork as possible while still considering natural variation in the material”.

In other words:  It’s about as good as you’re going to get.

According to thier website, Class A corks will let in about 1 mg of air at ambient temperature, while lesser cork can let in considerably more.

TCA Contamination

In the last 20 years, cork has had a heckuva time defending its stellar reputation as the topper of choice for aging fine drinks.   Prior to 2000, cork was the undisputed choice as a topper, accounting for well over 95% of all wine bottled,  nowadays it’s hovering around the 65-70% mark.

Why the big drop off?

Three nasty letters:  T…C…A

Short for trichloroanisole, TCA is a chemical produced when naturally occurring fungus, molds, or bacteria react with chemicals called chlorophenols.  Chlorophenols are found in many modern herbicides, pesticides, and cleaners and can make their way into a cork facility or winery via a number of insidious routes.   Once present, these cholorphenols can be extremely difficult to remove.

In the early 2000’s, TCA contamination was such a big issue that some 5% of all wine was suspected of having cork taint.  Today, thanks to a concerted industry-wide effort, that number has been reduced to around 1% of all wine sold.

Despite these improvements, the damage to corks reputation had been done, allowing competition in the form of synthetic toppers, twist-caps, and even boxes (gasp!), to become an accepted method to age wine despite their limitations.

What Does TCA Smell Like?

To us, a corked bottle smells a bit like when our dog decides to swim in a retention pond, and then we forget to wash the dog for a few days.

For a more scientific description, here’s a good chart we’d found online from that shows the smell profile of TCA based on contamination levels.   Notice the measurement is nanograms/ Liter level.  1 nanogram = 1 billionth of a gram.

Suffice to say, TCA is an extremely potent smell!

Nanograms of TCA in Cork

Using Clean Corks

With all the concern about contamination, many home-brewers swear by boiling their corks to provide some perceived extra sanitation.  We don’t do it, and we recommend against the practice.  Boiling won’t sanitize the cork any more than what the cork manufacturer has done, and it can actually weaken the cork at the cellular level.

To ensure the cleanest corks:

  1. Keep them in the manufactured seal container as long as possible.  If you have any left over after the bag has been opened, store the rest in vacuumed sealed bags once they’ve been opened.
  2. Buy from a reputable manufacturer.  Home brewers can have a tough time finding quality cork since we don’t command the volumes of major manufacturers.  We’ve had success with an e-commerce company called WidgetCo.  Headquartered in Houston, they deal directly with high quality cork producers in Portugal.

Buying Cork For Your Mead

Buying Cork

You can buy cork just about anywhere online, or at your local brewer’s outfitter, and range in price from a few cents per plug all the way up to a couple of dollars USD.  They come in a surprising wide proliferation of styles, shapes, grades.

So which one is right for you?

Define Your Needs

Despite all our snobbery with using cork, finding the right closure really depends on you’re looking for.   If you’re looking to pop open your mead shortly after bottling it, go ahead and use a twist-on cap, or some less expensive cork.  However for those aiming to age their mead for a year or more, we suggest spending a little more for quality cork stoppers from a reputable buyer.

Sizing Considerations

Most home mead brewers use standard sized wine bottles to contain their mead.  If you plan on doing the same, you’ll want to buy straight cork topper in size #9.  We’ve found the #8 to be too loose while #10 is way too tight.  As a rule of thumb, the longer the cork, the longer your mead will last, so we recommend that you use a 1-½” to 1-¾” cork, which is more than sufficient to keep your mead for more than 18 months.

Where To Buy

There’s plenty of manufacturers out there, but as mentioned previously we’ve had success with a company called WidgetCo.  Here’s the Amazon link for their “flor” #9 cork.  This is their highest end cork, and a great choice if you’re planning on aging more than 4 years.

For aging mead between 2-4 years, save yourself some money and get their WIDGETCO 1+1 Wine Cork, A Grade cork package.

FYI – we do collect a small referral fee from Amazon if you purchase through these links.  We’ve used everything we recommend and the purchase will be at no cost to you.

Corking Your Mead

I love corking day!  It’s the summation of all the hard work you’ve put into your mead.  Hopefully it should be a quick, painless, and triumphant operation.  However, unless you’ve the strength of Odin, you can’t just plunge the cork into your bottle with your thumb.  Corking your mead takes a little mechanical assistance, which you’ll get in the form a corker.

While there’s a bunch of styles of corker on the market today, they all fit into two main categories; hand corkers and floor / bench corkers.  Let’s take a look at each:

Hand Corkers:

Hand corkers are going to be less expensive than floor corkers, and take a little more finesse, practice, and effort to use properly.  Hand corkers are a good economical choice for the mead maker planning to produce less than 5 gallons (~25 bottles) of mead a year.   They do take a bit to get used to, so don’t get frustrated if you end up with a couple of broken bottles or a cork sticking halfway in the neck while you learn the nuances of the tool.

Soaking Your Cork

Because of the limited torque that hand corkers provide, you’ll need to use some kind of lubrication to get the cork seated in the bottle correctly.  This is especially true for the tighter #9 corks we recommend using.

For this, we take notes from mead-maestro Ken Schramm, author of the seminal mead book “The Compleat Mead Maker” who recommends soaking your corks in a gallon of water treated with 2 campdem tablets and a few drops of food-grade Glycerin.

Plunger Corker:  The cheapest of the lot, plastic plunger corkers use brute force, and no mechanical leverage to get the cork in the bottle.  You'll definitely need another person to stabilize the bottle, while another uses their body weight or a rubber mallet to get the cork in the bottle.


We strongly suggest only using a plunger for #8 corks or smaller for a standard wine bottle.  #9 cork and up are simply too tight to use plungers in our experience.  Also, as prescribed above, make sure to soak your corks beforehand.

Metal Double Lever Corker:  For a few more bucks, get yourself some leverage and buy a Double-Level Corker.  With the additional torque, you can use the #9 corks we recommend.


It takes some practice to center the plunger and you should do a cork soak.  

Gilda Compression Hand Corker: For a hand-corker, the Gilda corker is closest to the floor-corker in how it operators.  It's a two-phase operation; first phase compresses the cork when you pull the red handles together.  Second phase plunges the compressed cork into the bottle.  Most come with an adjustment for cork depth.


Now while it might get you some better force in the cork application, it's still a bit unstable, so we still recommend you use another person to stabilize the bottle during the 2nd phase.

Floor & Bench Corkers

Floor / table corkers are far and away the easiest to operate, provide the most leverage, and let you get away comfortably with a one-person operation.  What we like best is that we don’t have to soak or steam our corks.  Recommended for anyone making 10 gallons (~50 bottles) or more mead per year.

NOTE:  Floor corkers should be engaged quickly.  If you pull the levers too slowly, the cork will uncompress too soon, leaving a bit of the cork sticking out of the bottle.

Portuguese Floor Corker:   A great value for the price, to use simply place your cork on the top compression area and center the plunger, then place your bottle on the black base.  Finally pull the lever quickly and, viola!


It's not super tall, so be prepared to kneel a bit when corking.  Most include mounting holes on the base, and I've heard of folks bolting these to a table, but  then it might be TOO big for an averaged height human to pull the lever.

Italian Floor Corker: A larger version of the "Portuguese" floor corker, the Italian model is taller and provides more leverage on the handle.  Definitely easier on the back,  however you still have to bend over a bit to place the bottle and cork in the fixture.

Bench Corkers:  Our favorite ergonomically-preferred corker, it's great for mounting on a workbench or table.  While it is the most expensive of the lot, it's a must for us if we're doing 50 or more bottles at a time.  Saves us space and save our back from being hunched over a smaller floor corker the entire time.    Ours has mounting holes to stabilize the fixture to the table and an adjustment to set depth.

Conclusion

Well there have it, we sincerely hope that you enjoyed reading it as much as we enjoyed writing it.

If we've missed anything, or you have any questions, please leave a comment, we'd certainly be glad to hear from you!

Nov 09

It’s Here! The 2017 Mead Industry Report

By Ulf The Viking King Of Northumbria | Mead Industry

2-PAGE-2017-AMMA-Infographic

2017 AMMA Industry Infographic

Based on our contacts in the brewing world, it’s been pretty evident that the mead industry is growing at a good clip, especially in the last 3 years.  Of course, we’re never really sure of the exact data, until now.  Based on research and article from the AMMA, we’ve got a great infographic that details some pretty impressive figures.

The AMMA has been tracking the mead industry for a while now, but this year, not only did we see phenomenal change, we have this amazing graphic (see below) to show you what happened.

So what’s the Buzz?

Read More…

Sep 30

The Science Behind Making Mead

By Paul Fuller | Honey , Mead Basics

If you’re visiting this site, chances are you love making mead.  But have you ever wondered how the alcohol actually gets into the mead?  I mean, let’s face it, mead tastes great, but alcohol puts the fun in our delicious ambrosia.

And while it may seem magical to the mead drinkers of yore, the alcohol in mead has nothing to do with sorcery, it arrives to us through lovely science.

Read More…

1 2